Moisture Testing a Radiant Floor: Necessary and Easier Than You Think
Radiant floors may be toasty, but they can still be damaged by excess moisture in the concrete slab below them. Every time you install tile over a concrete slab, you need to make sure you’re not sealing in excess moisture. That doesn’t change for radiant floors.
The radiant tubing, whether hydronic or electric, certainly presents a new variable to the process. Don’t let the tubing below the concrete’s surface scare you into relying on a surface concrete moisture test.
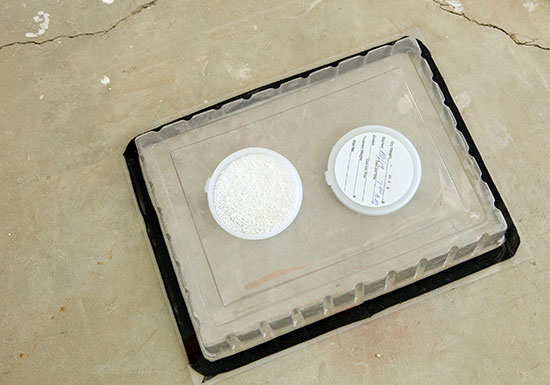
The ambient conditions around the concrete can create condensation. Moisture also travels upwards in concrete, which means the surface will hold less moisture than what’s below. In either case, a surface moisture test isn’t giving you an accurate picture of the moisture that matters: the moisture below the surface. That’s the moisture your tile installation traps and that could ultimately affect the tiling if there’s too much of it.

Don’t rely on a surface-based test because it may not give you an accurate picture of the concrete’s slab’s moisture condition.
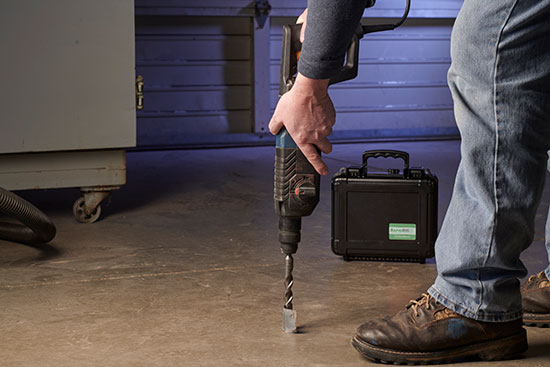
Instead, you want to conduct an in-situ relative humidity (RH) test, which measures the conditions below the slab’s surface. I get it—the thought of drilling holes into a radiant floor can be nerve-wracking if you’re not prepared. The RH test process for a radiant floor is easier than you think and very necessary. With a few precautions, you’ll be able to conduct ASTM F2170 compliant RH testing and install your tile with confidence.
How to Conduct an RH Test on a Radiant Floor
In most respects, performing an in-situ RH moisture test on a radiant floor isn’t too different from how you do the test on any concrete slab. You wait 24 hours for the sensors to equilibrate before you can take formal readings. You drill the sensor hole to 40% depth of the slab on grade.
Aha. There it is. Where to drill those holes to avoid hitting any tubing. You need to know exactly where the radiant hardware is below the concrete surface before you start drilling.
If installing the hydronic pipes or electric cables was part of your job, then you have a detailed map that outlines exactly where they are. If not, talk to the contractors who did that work and see if they do. Use chalk to mark on the concrete where the radiant flooring is. With the outlines right on the slab, you can map out where you want to insert the RH sensors.
Be precise as you measure where to drill the test holes in relation to the radiant hardware. You don’t want to get too close to any of the radiant hardware. If your radiant flooring map is accurate, the chalking process is the only extra step needed to conduct an ASTM F2170 compliant RH moisture test.
If you don’t have a map of the radiant floor, then you’ll have to do some investigative work. An infrared or thermal scanner can help you find variances in temperature below the surface, which can indicate a change in materials. If you find temperature changes running in a pattern, that could be the radiant flooring hardware.

Know where the radiant hardware is located before you start drilling the holes you’ll need for RH moisture testing.
If it’s an older radiant floor, there’s a chance the radiant tubing was either tied to rebar or copper tubing was used. In that case, you can try using a metal detector for finding metal in the concrete. Again, look for the pattern rather than random beeps; then you’ve found the tubing.
Whatever method you use to find the radiant tubing, chalk it out just as you would if you had the original map. Now you can get to the in-situ RH test.
What Happens If You Don’t Test for Moisture
A radiant floor is vulnerable to all the same moisture sources as any floor. Excess moisture coming from the radiant system itself isn’t a high risk of the system, but it is another variable. A hydronic radiant floor can also be at risk if there’s a tubing leak. The tubing should have gone through a pressure test to ensure there are no leaks.
Most modern hydronic radiant floors use PEX tubing, which is highly durable. It’s not likely to develop a leaky spot once installed. An older hydronic radiant installation may use copper tubing, which can weaken after extended use—especially at the turns.
Tile and stone—popular flooring choices above a radiant system—can be affected by excess moisture. Damage can show up in several different ways. The setting material can become oversaturated causing the tile to disbond. The excess moisture can be a vehicle for excess salts to rise from within the concrete causing efflorescence which usually appears in the grout joints. You may also see discoloration of the grout due to excess moisture. No matter the symptom of the excess moisture, the cost in time and money is easily avoidable if proper moisture testing is conducted.
Using the Right RH Test
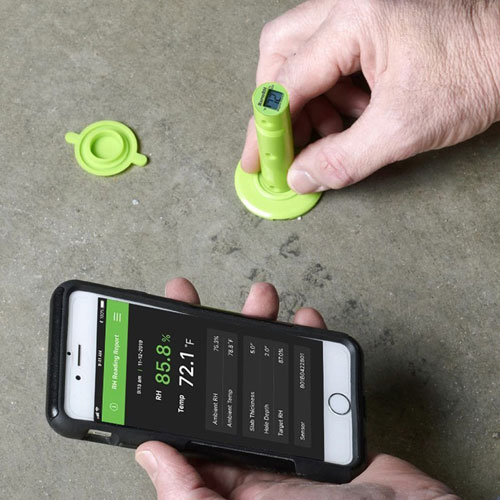
Because concrete moisture testing is so critical, make sure you’re using the most accurate in-situ concrete moisture test available. Wagner Meter’s Rapid RH® L6 provides unbeaten accuracy, and it’s the simplest in-situ RH test to use. Just touch the reader to the sensor to capture the RH and air temperature within the slab and the ambient conditions. You can save time by automating your reporting. Download the DataMaster™ L6 app to your phone or tablet and the test data will automatically upload via Bluetooth® to the DataMaster L6 app.
Each L6 sensor has an onboard memory device that can hold hundreds of readings, so it stores the data from every reading you take. Even though your data can be uploaded to the DataMaster L6 app, the sensor’s memory chip is a good backup. If you can access the sensor, you can always upload the test data stored in the sensor to the DataMaster L6 app—even a year later.

For radiant floors, you’ll want to use an in-situ RH test to assess the moisture condition of the concrete slab.
As you collect data over time, you’ll have enough data points to see how the concrete is drying over time and whether you have moisture spots that are not drying as quickly. You want an RH test that provides you the information and tools to get ahead of any potential moisture problems.
When It Comes to Moisture, Treat Radiant Floors Like Any Other
You always need to test for moisture when installing tile over concrete. The presence of radiant tubing doesn’t stop excess moisture from creeping up the tile stack. The alkaline salts in the excess moisture can still weaken bonds and crack tiles—even in a radiant floor.
Don’t let the presence of radiant heating tubes deter you from conducting RH moisture tests. Adding the simple step of chalking out the tubing on the concrete so you know where not to drill a test hole is time well spent to avoid future moisture-related damage. Protect your work by always taking moisture management seriously, regardless of whatever else is below the concrete surface.
Previously published in the Tile Magazine
Jason has 20+ years’ experience in sales and sales management in a spectrum of industries and has successfully launched a variety of products to the market, including the original Rapid RH® concrete moisture tests. He currently works with Wagner Meters as our Rapid RH® product sales manager.


