10 Steps to a DIY Distressed Wood Floor
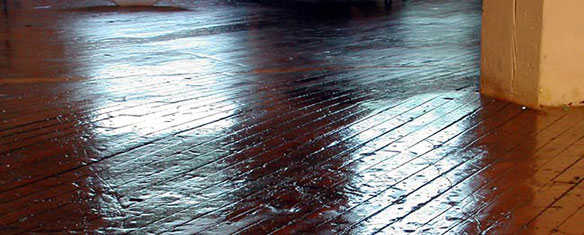 Nothing beats the look and charm of a vintage wood floor, and this style of wood floor is gaining popularity with those who that want a lived-in feel for their homes and places of business.
Creating that distressed look for a new floor is easy in concept, but it can be time- and labor-intensive and does require some artistic skills. However, if a hand-finished floor is preferable to pre-distressed flooring, the process can be fun and even economical. Ensuring the floor lives up to its look means taking no shortcuts when it comes to proper installation.
10 Steps – How to Create the Distressed Wood Floor You Want
1. Select your wood flooring

Woods like pine, oak, and some bamboos distress more easily and deeply than others; very dense woods like maple and certain exotics take more effort during the distressing process and may not finish with a truly authentic look.
2. Let the wood acclimate to the job site
Why go through the effort of distressing the floor only to have it fail from moisture problems? Check the flooring frequently with an accurate wood moisture meter, adjusting (or setting) for the correct wood species, until the floor has reached its equilibrated moisture content (EMC).
3. Once the floor has reached its EMC, install according to the manufacturer’s directions
4. Practice your distressing technique
to be sure you have the look you want. Depending on the technique you use, the marks will be irreversible– sanding won’t remove them, so you want to have a clear idea of what effect each type of object will produce on the flooring. And work carefully around knots; they can throw tools in unexpected directions.
Tools to try include:
- wire brushes
- hand scrapers and sanders
- hammers (heads or claws), mallets, screwdrivers
- metal meat tenderizers
- saw blades
- soldering irons for burn marks or scars
- pellet guns
- cloth bag or sock filled with bolts or rocks
- high heeled or hob-nailed shoes
- metal chain links
- objects to embed – nail heads, bolts or screws
It’s also possible to use a commercial floor sander with specialized distressing disks or a distressing drum, but be careful to keep the motion random for an authentic look, and the sawdust adequately collected for site health and safety purposes.
5. Begin distressing the wood
Working with the grain of the wood as much as possible and varying the angle of your tool to alternately tear the grain or create burnished areas. Stomp, grind, scratch or beat until you’ve reached the look you want. Keep in mind that deeper distressing in traffic areas will look more authentic but that even low-wear areas need some distressing for a consistent aged look. Let natural foot traffic slightly wear and darken appropriate areas too, if time allows (and shoes aren’t muddy).

Free Download – Wood Flooring Installation: What To Expect
6. Make sure the floors stay at service conditions
During this process and avoid letting excess moisture contact the flooring during distressing. The unfinished flooring will rapidly absorb any excess moisture that contacts it through spills or elevated relative humidity levels in the building. If not thoroughly dried out again, that moisture will cause problems down the road.
7. Prep the floor for staining
Completely vacuuming all standing sawdust from the distressed floor. Any burrs or splinters created in the distressing process should be lightly sanded or scraped down.
8. Highlight individual spots
(like knots or embedded objects), if desired, with dark wood filler, dark stains, or even ink or resins.
9. Apply finish stain

It’s possible to highlight the distressed area by applying several shades of stain and scraping between each for a very distinct look or to allow a single stain color to settle into the indents and textures of the distressed wood during each layer application. Be sure each stain application has time to completely dry before applying the next according to the manufacturer’s
directions.
10. Polish and enjoy
A distressed floor will require the same maintenance as any other wood floor, but the beauty of it is that in the end, wear and tear will only add to the charm and casual feel of its natural warmth.
Jason has 20+ years’ experience in sales and sales management in a spectrum of industries and has successfully launched a variety of products to the market, including the original Rapid RH® concrete moisture tests. He currently works with Wagner Meters as our Rapid RH® product sales manager.
Related Posts via Taxonomies
Last updated on May 4th, 2021

