Tips and Tools to Keep Your Callbacks Low When Moisture Levels are High
Previously published by Premier Flooring Retailer
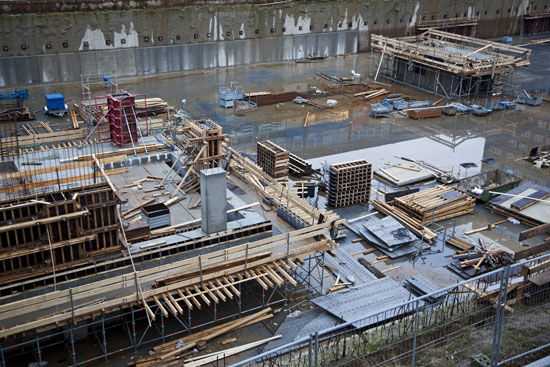
If the structure is new construction, permeable materials like wood framing, subflooring and sheathing might contain excess moisture, either from the air, precipitation or construction water. All structures need proper vapor retarders, either under a concrete slab or in the crawl space below the floor. If groundwater levels are high, this becomes even more important.
Excess moisture is always a risk when you’re installing wood flooring, but in unusually high moisture situations, you need to take extra precautions. U.S. moisture-related floor covering failure claims exceed $1 billion every year.¹ That’s why it’s essential to know how to mitigate these risks.
Here are some tips and tools you can use in high moisture situations to avoid wasted time and money, and keep your callbacks low.
Tips to Lower Moisture Risk Before Installation
Problems with building construction can cause moisture problems. Site grading with poor drainage can cause constant dampness or even pooling in crawl spaces. Concrete slabs can absorb moisture from the soil which then is able to travel through the slab and to the surface, getting trapped under the flooring.
To prevent excess moisture problems of this nature, all structures need proper vapor retarders, either under a concrete slab or in the crawl space below the floor. If groundwater levels are high, this becomes even more important.
One process for creating a more moisture resistant crawl space is to install a 6-mil or thicker polyethylene plastic vapor retarder on grade through the entire space and wrapping it up the walls at least 12 inches. Many builders are actually utilizing more robust retarders like Stego Industries² due to the low cost and increased durability. All seams should overlap 12 inches and be sealed with PVC tape.
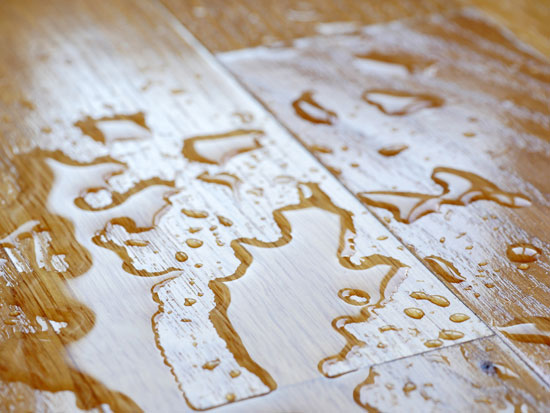
As wood absorbs moisture, it expands. When it loses moisture to the air, it shrinks. If this expansion and contraction occur after the floor is installed, it will cause surface irregularities like bowing, cupping, tenting, crowning, and gaps.
Crawl spaces must also have adequate ventilation. Most crawl spaces have air vents, but they might not be doing enough. First, make sure that the vents are up to code. If the vents still aren’t doing the job, an alternative is to install an electric fan ventilation system and if necessary, a dehumidifier.
If the structure is new construction, permeable materials like wood framing, subflooring and sheathing might contain excess moisture, either from the air, precipitation or construction water. In this case, you’ll need to do some major drying of the structure. Enclosing the space and using portable dehumidifiers will do the job. You can either do this yourself, using rental equipment if necessary or contract it out to a specialist.
Provide adequate ventilation in the space where the flooring will be installed. HVAC systems and humidifiers should be operational for 5-7 days before delivering the wood flooring. All wet trades should complete work before the flooring is delivered.
NWFA requires that you test for moisture in the wood subfloor at several locations in the room — a minimum of 20 tests per 1,000 square feet — and then average the results. A high reading in an area indicates a problem that must be corrected. Pay special attention to exterior and plumbing walls.
The Importance of Equilibrium Moisture Content (EMC)
The moisture content of wood constantly changes as the surrounding environment changes. When ambient moisture increases, wood absorbs moisture until it reaches a balance with the ambient air. As ambient moisture decreases, wood loses moisture in balance with it. This state of balance is called the equilibrium moisture content (EMC). The value of EMC will be change as ambient temperature and humidity levels change.
As wood absorbs moisture, it expands. When it loses moisture to the air, it shrinks. If this expansion and contraction occur after the floor is installed, it will cause surface irregularities like bowing, cupping, tenting, crowning, and gaps. Ambient moisture content in finished spaces is kept pretty constant, so a properly installed floor will rarely experience problems after installation. But if the floor is installed with a moisture content that doesn’t closely match the ambient moisture content in the finished space, failure can result.
This is why the wood must have the correct equilibrium moisture content or EMC before installation. It must be given time to come into balance with the conditions it will experience in the finished space before it’s installed. The way to achieve this is through the process called acclimation.
To acclimate the flooring, follow the manufacturer’s specific process. The National Wood Flooring Association (NWFA) also has specific guidelines for proper moisture content levels during acclimation and installation.
Ideally, you should acclimate the wood flooring in service conditions. If possible, place the wood flooring in the room where it will be installed. Use a wood moisture meter to take a baseline moisture content reading of the subfloor and the wood flooring, and to measure the ambient relative humidity (RH). If your moisture meter can’t measure ambient humidity, use a thermo-hygrometer.
Wagner Meters has introduced their Orion® 950 pinless wood moisture meter with dual-depth capability to read wood moisture from the surface down to ¼” and 3⁄4” depths for thin wood samples such as floors, or in or thicker wood samples. Its built-in thermo-hygrometer functions measure the ambient temperature and RH and calculate EMC. As it is pinless, the Orion 950 will not damage wood flooring.
In order to monitor and maintain steady ambient temperature and humidity throughout the acclimation period, it’s recommended that you take readings of the ambient conditions regularly. The best way to do this is with automatic data loggers that can be installed at the site.
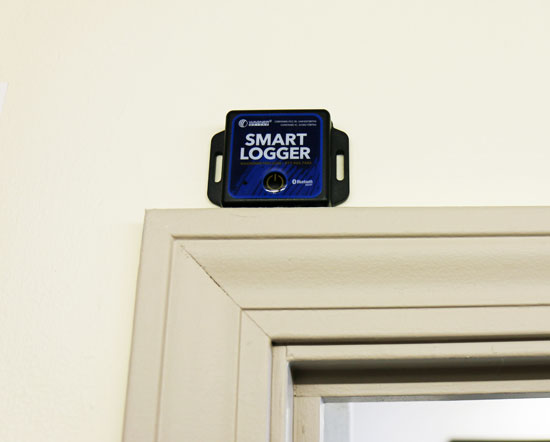
Install a data logger where you have placed the flooring to acclimate, whether that’s in the space where the flooring will be installed or in a nearby space.
Wagner Meters has a small RH and temperature data logger called the Smart Logger™ that helps ensure proper acclimation of wood flooring by monitoring and recording ambient RH and temperature 24 hours a day, even when you’re away from the job site. Readings can be downloaded at any time to the Smart Logger app on your mobile device. You can configure it using the Smart Logger app on your Bluetooth® mobile device to collect and store readings on a regular schedule, then return to the site to download the data to your mobile device. Using a data logger like the Smart Logger will help you be certain whether optimal ambient conditions were maintained at all times while your wood flooring acclimates. Install one where you place the flooring to acclimate, whether that’s in the space where the flooring will be installed or in a nearby space. After the acclimation period, move the logger to the space where the floor will be installed (if it’s not the same space) and install another one in the crawl space below. You’ll use them to monitor ambient conditions through the entire installation process, and ideally, after installation as well.
After the prescribed acclimation period, use a wood moisture meter to check a representative sample of flooring for the proper moisture content according to the manufacturer’s specifications. Even if you follow the manufacturer’s recommendations for the length of time acclimate, the only way to be sure the flooring has reached EMC is to use a wood moisture meter.
Tips to Lower Moisture Risk During Installation
Maintaining proper ambient temperature and humidity during the installation process is just as essential as it is before the installation. Keep your automatic data loggers in operation during the entire process. They can alert you to any dramatic changes at the job site and allow you to take the necessary steps to ensure a successful installation.
Correct use of flooring fasteners can help minimize problems caused by expansion and contraction due to moisture. Use the correct type, dimensions, and placement of floor fasteners. If you don’t use enough fasteners, gaps can develop between planks. Fasteners that are too large or spaced too closely can cause splits. The wrong type of fasteners can fasten the floor too tightly and cause squeaking. Always follow the directions of the flooring manufacturer.
Provide expansion gaps at the floor perimeters with the recommended width for the flooring product. Provide center expansion breaks in floors that exceed the manufacturer’s recommended maximum span. Breaks can be covered with T-molding and placed in doorways and between rooms to make them more inconspicuous.

Free Download – Is a Pin or Pinless Moisture Meter Best For You?
Monitoring Ambient Conditions After the Installation
After the installation is complete, it’s important to ensure that the correct ambient conditions are maintained in the space. If the ambient conditions aren’t maintained properly, the moisture content of the flooring system can change causing dimensional changes to the floor. Even if you’ve done your job and kept moisture conditions right, the client can cause damage to the floor by not maintaining the proper service conditions after the floor is installed.
You can help prevent this problem by using the Wagner Smart Logger to provide constant monitoring and recording of ambient temperature and RH after the installation is complete.
This is especially important for residential clients who might not maintain the ambient conditions as consistently as commercial clients.
Returning to the site to download data logs can also help you in other ways. It shows your clients a high degree of professionalism when they see you using the latest technology. It reminds them to keep maintain proper ambient conditions. And it’s an additional “touch point” with the clients to keep your name in front of them.
Manage Your Risks
Excess moisture is always a risk when you’re installing wood flooring, but in unusually high moisture situations, you need to take extra precautions.
To help mitigate your risk of moisture-related problems, be sure to use these tips:
-
- Make sure all structures have proper vapor barriers, either under a concrete slab or in the crawl space below the floor.
Make sure that crawl spaces must also have adequate ventilation, either with proper venting or by installing an electric ventilation system. - Take care of any excess moisture problems in the structure using dehumidifiers or contracting it out to a specialist.
- Know the importance of EMC and how to test. Make sure you have a high-quality wood moisture meter.
- Maintain proper ambient temperature and humidity during the entire installation process using automatic data loggers.
- Use the correct use of flooring fasteners to minimize problems caused by expansion and contraction due to moisture.
- Provide expansion gaps at the floor perimeters.
- Provide center expansion breaks in floors with long spans.
- Finally, remember to monitor ambient conditions after installation. Use automatic data loggers to ensure that the correct ambient conditions are maintained in the space.
- Make sure all structures have proper vapor barriers, either under a concrete slab or in the crawl space below the floor.
For more information on concrete and wood moisture testing, give us a call (541) 291-5124.
¹Source: https://ifti.com/about-ifti-ca/history/
²Source: https://www.stegoindustries.com/
Jason has 20+ years’ experience in sales and sales management in a spectrum of industries and has successfully launched a variety of products to the market, including the original Rapid RH® concrete moisture tests. He currently works with Wagner Meters as our Rapid RH® product sales manager.
Related Posts via Taxonomies
Last updated on May 4th, 2021

