40 Woodworking Tools Every Woodworker & Carpenter Should Have – Page 4
#31: The Jig and Dado
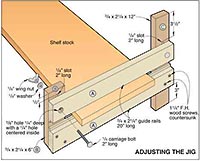
Your table saw is much more versatile if you have the full range of dados and jigs to use with it. Jigs were mentioned earlier in this list, and their use for tenons, tapering, panel-cutting, and many other uses. A stacked dado is two blades with a set of wood chippers in between. This is used for cutting grooves or removing large parts of stock. The saw blades make the side of the groove straight while the chipper removes the large part of the material between the saw blades. You can adjust the width of the chippers to get bigger cuts. You can also use a wobble blade for this, but it – wobbles – and vibrates your table saw, and won’t cut a flat edge.
#32: The Compound Miter Saw
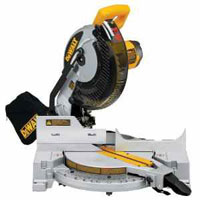
You already have a tenon saw with a miter box, but if you’re going to get into the crown molding and other such projects, you’ll need a compound miter saw. You may have used your circular saw for those beveled cuts and miters. However, nothing beats the precision of a good compound miter saw for those combination cuts.
A miter saw can be set to bevel up to 45 degrees and will cut at a 60-degree angle in both directions. The miter gauge on your saw should be easy to read and clearly marked. There should be hard stops at each major point, such as 0, 15, 22.5, 30, and 45. These degrees should be stopped on both sides. Not only that, but you should be able to lock the saw at any angle you wish.
The bevel on the saw is the ability to tilt the saw to compound the cut – hence the name. This gives you the ability to cut 2 angles with one cut. You’ll need the 10” saw blade if you intend to cut 6” lumber. The 12” blade is nice, but few people really need the extra size, although they appreciate it if they have it. 8” blades are just too small for most woodworkers. You can find compound miter saws with a sliding arm function like a radial arm saw, but they’re pretty pricey.

Download Our Free Top 40 Woodworking Tools Guide
#33: The Router
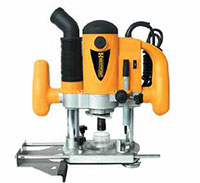
Every woodworker should have a router. With the router, you can shape the edges of your work. The variety of shapes is endless, with the various bits available. If you’re a beginner, a stationary base router will do almost everything you need. This will start and end the cut at the same depth that you set before you make the cut.
A plunge router allows you to plunge the bit into the wood, make your cut, then lift it back out. You can use your stationary router in a router table, making long cuts with ease using a fence. Some woodworkers even convert their table saw to accept a stationary router so that they can use the rip fence and feather boards.
You should get a router with at least 2 HP, or it will be underpowered for hardwoods. It needs variable speeds since large bits need to operate at slower speeds. If you don’t have a variable speed router, you can burn your bits. You’ll also burn hardwoods if you can’t slow down the router speed.
Consider the size of the collet, too. This is like the drill size – they’re available in ¼” and ½” size. You can put the smaller bits in the larger size, but not the other way around. The larger bits are harder to find in the stores and are more expensive. They balance out their cost and rarity, though, because they are more stable than the ¼” bits, and won’t chatter as much during use.
You’ll need to decide between grips on the router. Some of them have pistol grips that you hold with one hand, others have 2 handles on opposite sides. Think about the weight of the router and the uses, and decide which is best for you. Either way, though, the on/off switch should be within finger reach. You shouldn’t have to move one of your hands to switch it on or off.
Some of the newer routers have sensors that evaluate the load. They adjust the RPMs accordingly to keep them within a given range.
#34: The Band Saw
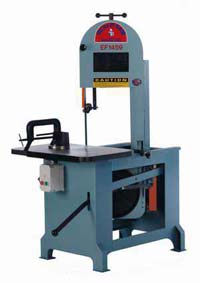
You just can’t beat a band saw for cutting precise shapes and curves. But, what a lot of woodworkers don’t realize is that the band saw is a powerful ally when cutting rabbets and tenons. You can also rip small pieces of wood and even make your own laminate strips with a band saw. There are free-standing, or cabinet, band saws, and table mount models that you can attach to a workbench or a dedicated stand. The free-standing models are usually bigger, more sturdy saws that have more features. They also have larger motors. These are the models used by professionals. However, you can still get professional results from a mounted saw.
You’ll want to look for 2 things with your band saw: depth of cut and throat. The depth of cut is the distance between the cutting plate and the upper guides on the blade. This will determine the thickness of stock you can cut. There are some saws, however, that can have risers attached to make it possible to cut thicker materials, so you can go from 6” to 12” with the use of a riser.
The throat is the distance from the saw blade to the back frame of the saw. A cabinet band saw will have a deeper throat, usually about 18”, while the bench models have 12” to 14” throats. This will determine the width of stock that you can cut. When you see information referring to a 12” band saw, it’s referring to the throat.
The size of the motor will matter. Most band saws made for home hobbyists will have up to a 1 HP motor. More expensive ones will have variable speeds, but the woodworker doesn’t usually use the different speeds. The slower speeds are intended for cutting metal and plastic. They may come in handy if you’re planning on shaping exotic woods such as acacia or bamboo. Just be sure to check the moisture content levels in these woods before you make any fine applications, or they’ll change their size and mess up your work.
The cutting surface, or table, should be made of steel alloy, aluminum alloy, or cast-iron. It should also be adjustable up to 45 degrees so that you can make cuts at an angle. The measurements of the cutting surface should be about 16” x 16”, with miter marks.
The saw blade of the band saw is actually a continuous band, like an alternator belt, with teeth on one side. It rides on 2 wheels. The width of the band will determine the radius of the curve you can cut. As a woodworker, you’ll want saw blades from 1/8” to 1” in width, keeping in mind that with the wider blade, you can’t cut as wide on your curves. The number of teeth per inch will matter here, too, with 1/2″, ¾”, and 1” blades at about 3 teeth per inch, and thinner blades with more teeth.
The wheels on which the saw band rides should have a brush on them to keep debris from accumulating. These look like the bristles of a paintbrush being held in a clamp. You’ll need to change out the brushes once or twice during the lifetime of your band saw.
Between the band saw blade and the wheel is a tire. This looks like a big rubber band. Most of them are made of either rubber or urethane. You have to glue the rubber ones onto the wheel, while the urethane doesn’t have to be glued down. The urethane also lasts longer, too. The tires you choose for your saw should be a little smaller than the wheel – again, it’s like an alternator belt. You want it to be tight. If you have a band saw that just doesn’t do the job anymore, consider your maintenance of the machine. It could be that it just needs new tires and brushes. If the tires are dried out and cracked, the saw blade will drift and chatter. If the tires and brushes have been worn out for a long time, you may even need new wheels. But, once you replace all of these and adjust the wheels, you should have a smooth-running cutting machine.
#35: The Radial Arm Saw
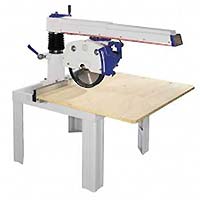
The radial arm saw is expensive, bulky, and heavy. And, it’s absolutely indispensable to those who own one. If you choose to get one, just plan to have a permanent home for it, because it’s probably not going to travel to worksites with you.
The radial arm saw is usually used to perform crosscuts. However, you can use it for bevels and miters, dadoes, rabbets, moldings, and even as a router guide. It can perform the same functions as a compound miter saw and a table saw. However, it’s a little harder to use in these capacities. It’s kind of a tradeoff – you get a multi-purpose saw for the more extravagant price, but it will be a little harder to use than saws made specifically for those purposes.
With a radial arm saw, you’ll move the saw rather than the material. The depth of the throat will make a difference with this saw. Your set-up will determine the success of your work. Set up your fence carefully, and make sure your stock is snug up against it. Then, turn the saw on, and let the blade get up to full speed before you start pulling it toward you.
Now, with this saw, you’ll get a lurching, crawling effect that you may not be prepared for. Experts say to install the saw on the work table with a very slight backward slant in order to keep it from “walking” forward on your workbench. You’ll also need to be prepared for the saw blade to “grab” the wood. This is one reason that set-up is so important. With a fence securely in place, the wood has nowhere to go, and there’s less opportunity for your hand to get yanked into the blade. The saw will try to determine the speed it travels through the wood. You’ll have to keep a grip on it, and make it go at your speed.
You can use your radial arm saw to cut dadoes and rabbets. Your dado blade installs easily into the arm. Just be sure to remember the direction of cut, because it’s different from your table saw. Also, always reinstall the blade guard when you change the blade in any of your saws.
While this saw may be better at cutting complex compound angles, it can be trickier to set up. Once you think you have it set up, make sure the clamping levers are locked into place. You can set the radial arm saw to rip narrower stock. Just make sure that the riving knife and pawls are in place should there be a jam or kick back.
Setting the depth of cut is important. With other types of saws, since the cut is to the top or outside, this won’t matter. But the radial arm saw is being drawn across the stock, cutting all the way through it into the surface below. So you’ll have to pay close attention to the depth of cut so as to not sacrifice your work surface on a regular basis.
#36: The Drill Press
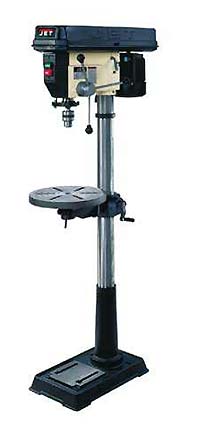
While most holes can be drilled with your power drill, there will be applications in your woodworking where a drill press will be invaluable. The drill press provides you with the ability to do precision drilling and deliver especially accurate large-diameter holes.
One of the best features of a drill press is the ability for you to set the depth of the hole. This is especially useful when you have a number of holes you need to drill, all of the same depth. The drill press also allows you to use Forstner bits, hole saws, and spade bits, drilling wide diameter holes to depths that would be very difficult to drill by hand.
The features you should look for when you purchase your drill press will begin with a bench mounted or free-standing model. For the record, the free-standing models usually have larger motors, making them more powerful. This means your work will be smoother. You can also work on larger stock pieces with the free-standing drill press. Look for variable speeds, too. This will be accomplished by the ability to switch the belt to a different pulley setup, changing the speed at which the chuck rotates. This is important because hardwoods and softwoods must be drilled at different speeds (softwoods require faster speeds than hardwoods, while hardwoods will burn at high speeds). Finally, look for a feed that has several handles on it. You want the utmost control when you plunge the drill bit, and having 2 or 3 grips on the lever will help that. The plunge lever should be lockable so that you can set the depth of plunge, with an automatic redraw.
The free-standing floor model may also come with another great feature – the ability to swing the drill table out of the way. Some of them can also be tilted to a 45-degree angle, too.
Look for a table that has slots that allow for the use of clamps, so that you can use jigs and fences on the table. There will be slots on the table that allow for this.
To drill really large stock, look for a drill press that has a really deep throat. Just as with the band saw, this is the distance between the working edge, in this case, the drill bit, and the vertical support at the back of the press.
Your drill press can really help with joinery, as well as in drilling holes. With the proper attachment, you can actually drill square holes. The chisels that cut the square part are attached above the chuck, and the drill bit fits inside. This makes drilling mortise and tenon joints easy.
Other uses and tips for your drill press:
- Use it for sanding. You can use a sanding drum in the chuck and adjust the table height to sand curved cuts easily.
- Offset holes are easy to drill when you clamp the piece down.
- Small pieces can be clamped to the drill press table, preventing them from moving around as you drill.
- Make a V jig to hold round items, such as chair legs, for drilling.
- Clamp stop blocks to the drilling table if you have to drill in the same place on several pieces of wood.
#37: The Surface Planer
The surface planer is high-tech’s solution for the dedicated woodworkers through the generations who have patiently and skillfully planed their stock by hand to get it the right thickness. The time-saving surface planer makes your world much simpler. The planer has a table onto which you feed your stock. This table is between 10” and 14”, so that’s the maximum width of stock you can send through. A set of blades rotates, cutting the wood as it is fed through.
You adjust the depth of cut with a crank, usually on one end of the planer. It actually looks kind of like the wheel on a sewing machine. Most planers will plane your stock down 6 inches, but you need to do this in small increments.
You achieve a smooth, evenly-planed surface, the intake rollers inside the planer will pull the stock in and feed it under the knives, while outtake rollers pull it out the other side. The stock will move slowly and steadily beneath the knives which are rotating at a very high RPM. This yields a smooth finish to your stock. There should be pawls within the planer, so that if the rollers lose their grip on the stock, it won’t kick back out of the machine. You should also check to see if the surface planer you’re considering has a dust vacuum because the amount of sawdust generated by these machines is epic.
You should always use hearing protection when you’re using a surface planer. These will be the noisiest tools in your workshop and can cause damage. Safety glasses are also suggested for all power equipment.
Tips for using the surface planer:
- Hand-feed the stock until both sets of rollers have grabbed it.
- For extremely long pieces of stock, use extension tables or feed rollers on each end.
- Keep the stock in line with the plane table to avoid gouges. If the stock enters at an angle, it will be gouged.
- Stand beside the stock you are feeding into the planer. If you stand behind it, and there is kick-back that the pawls don’t catch, you will be injured.
- NEVER use your hands to clear a jam. Use a spare piece of scrap lumber to push out anything that gets stuck in the planer.
- Don’t try to plane items that are too small for the planer. These are best hand-sanded or clamped, with the block plane used, instead.
#38: The Jointer
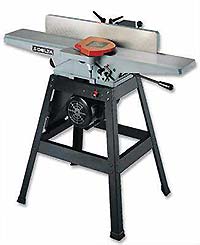
The jointer is the most reliable and accurate way to ensure square edges. It also will yield flat surfaces that won’t go through your surface planer. Rather than using a saw blade, the jointer uses a cutter head that rotates at high RPM. It is positioned between two tables. The infeed table is usually at a lower height, based on how much you want to remove from your stock. The outfeed table is at the same height as the cutting edge, supporting the board as it is cut. There should also be a fence to help provide accurate cuts.
You’ll need a flat edge to do your woodworking, and the jointer can cut a flat edge and smooth surface on your stock. For instance, if you have a 2×4 with a roughed up edge, you can place it, rough side down, against the fence on the jointer. Using a push stick, push the 2×4 across the jointer knives, and it will cut down the rough parts of the edge. You may have to make several passes in order to get a completely smooth surface. This will not only give you cleaner cuts, but it will save wear and tear on your motor and knives. Remember, too, to always allow the blades to get up to full speed before you begin cutting.
You’ll need to give slight downward pressure to the stock as it goes through the jointer. Shift the pressure to the front of the stock as it exits the blades. Do not lift the stock until it is completely free of the blades. Then, return to the starting point for your second pass.
A jointer makes it possible to salvage bowed or warped stock that you previously may have had to discard. With a bowed board, place in on the infeed table with the bow in the center, facing up. This will keep it from rocking on the table. The two ends of the piece will be joined first, which is OK. If you have to joint an edge that is rocking, keep your pressure on the infeed table to reduce the rocking as much as possible.
To square edges, make sure that the fence is truly at a 90-degree angle to the tables. Remember your layout square? You’ll use that for this task. Since you’re preparing a squared edge, place most of your pressure on the fence, making sure the wood stays straight up and down as the blades do their work. Numerous, small cuts are preferable to one big one.
The fact that the fence can be angled gives you the chance to make mitered butt joints. You can also make plunges on the jointer, giving your stock chamfered edges.
Non-Tool Tools
It may well be that the most valuable tools you own in your woodworking shop are not tools at all.
#39: The Manual
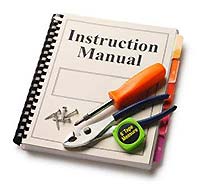
Each of the tools you purchase for your shop will come with a manual. Just resign yourself right now to reading instructions. Most tools returned to mail order companies and home improvement stores as “defective” simply were not used according to instructions. The hands-on nature of woodworking often means there is a large population of craftsmen who don’t care to read instructions, but when you’re dealing with, ultimately, thousands of dollars’ worth of equipment, all of which can eat your hands, you’re much better off referring to the operator’s manual, rather than learning by trial and error.
A single drawer file cabinet will hold all of your manuals and warranty information. Keep a separate file for each tool – yes, even your screwdrivers – because many of those are under warranty, too. For filing purposes, file either according to make, such as Black & Decker, Ryobi, or by the type of tool, such as “router bits,” “router,” “router table,” etc.
You may be able to find magazine protectors at your local office supply store. While they are harder to find, they will make it possible to keep your manual with your equipment without the manual being damaged. Some truly dedicated woodworkers even make their own notebooks out of the operator manuals. They take them apart, putting each page in a page protector, reassembling them in a notebook binder. The binder is then left on a shelf under the saw, if possible, or displayed on a shelf for easy reference. You can imagine that the equipment of these woodworkers is also in pristine condition. While you may not go to these lengths to keep your manuals handy, at least read through them at least once, when you first get your equipment.
Each manual will have suggestions for not only safe operation but for special uses, as well. Chances are if you’re having trouble with your machine, the problem is addressed in the manual, and you can save yourself a lot of time and frustration by troubleshooting with the operator’s manual.
#40: The Safety Equipment

The safety equipment you use may save irreplaceable parts of you. Fingers don’t grow back, so use feather boards, push sticks, and always use tools according to directions. You should always have the proper backup as you feed material through machines, and keep the pressure applied to the correct parts of the stock, as in your instruction manuals.
Your vision and hearing are equally irreplaceable, so always wear safety glasses. If you wear prescription lenses, you order them with safety lenses, making it easy to protect your eyes while you work. Ordinary glasses are not safety lenses and may shatter if a projectile hits them, causing more damage.
Your hearing can be protected with earplugs purchased at the hardware store or the local Wal-Mart. If you don’t find them in the sleep-aid section, check the hunting section. You can find the kind that has a string connecting them so that you just pull them out of your ears when you’re finished cutting, and they lie across your shoulders until you’re ready for them again.
There you have it – 40 tools that every woodworker should think about owning. Ranging in complexity from the humble claw hammer to the complex and potentially dangerous jointer, these tools each have unique uses in the hands of skilled workmen. Proper care of all tools will prolong their lives, and proper use of safety equipment will prolong the quality of your own life. Accessible storage will make your shop not only a safer environment, but it will save you a great deal of time in looking for pieces and parts that you use on a regular basis.
Remember that, with numerous power tools, you’ll need dedicated outlets. While you may not run more than one power tool at a time, it’s still better to try to arrange your shop so that each tool has its own outlet, rather that stringing multi-outlet adapters across the floor, with 5 and 6 powerful tools plugged into each one.
If you keep hand tools in tool drawers or on peg boards where they won’t roll around and bump into each other, the edges and handles will last longer. Keep saw blades oiled and stored flat, when possible, so that the teeth won’t be damaged.
Finally, make sure you have good lighting on all of your work surfaces. Overhead lighting is vital to any workshop but can cast shadows on your work surface. Shadows can not only interfere with accurate cutting but can be downright dangerous with the optical illusions they can cause, leading you to get your hands too close to saw blades. As you lay out your shop and plan outlets for your power tools, plan for an outlet for a work light, too. You can get excellent work surface lights that will clip on, or mount to the wall behind your equipment, or stand on the floor and adjust to shine on multiple surfaces.
As Sales Manager for Wagner Meters, Ron has more than 35 years of experience with instrumentation and measurement systems in different industries. In previous positions, he has served as Regional Sales Manager, Product and Projects Manager, and Sales Manager for manufacturers involved in measurement instrumentation.
Related Posts via Taxonomies
Last updated on August 2nd, 2022



Yes, the most of these tools are quite helpful! A reciprocating saw is also a helpful tool. The ability to quickly switch from a metal saw blade to a wood saw blade makes it highly practical to disassemble them. thanks for sharing.
I just have a question I have looking all over for?what kind of tool on a budget do you use to make the slits where the knife goes in a knife block?
I love all that I see you are great and informing thank you for helping my mentality about the beauty in using hand tools
Greetings!
Pls include first aide box., nevertheless,ess a helpful list
Thanks, Ron for a detail list of woodworking tool,
I am trying to have all of them. What about a chainsaw, I don’t see it here.
this was really helpfull to me for my work at school
Thank you, a beautiful guide.
Hi Ron, this is absolutely an ultimately guide, i don;t need to search further as you have mentioned each and every tools are that are related to woodworking. thanks mate 😉
I was looking for information regarding this and finally got one. Thanks for sharing the information with us. The article was a great help to me.
It is truly a nice and useful piece of information. I’m happy that you simply shared this useful info with us. Please keep us up to date like this. Thanks for sharing.
I really liked the list, it is very complete and thorough. Plus, the safety glasses part reminded me of Norm Abram and his New Yankee Workshop.
It’s very good and very excellent article. I really enjoyed this post and I hope you will keep posting this kind of post in future.
With air tools 😀
A compressor would be good too 😉
Fantastic! I really appreciate.
Thank you for this informative list.
However,some important items were omitted in respect to safety equipments such as , fire extinguisher, hand gloves, safety boots,protective glasses, factory coat / overall, and first aid box.
Furthermore, no mention was made for ICT equipment which is vital for communication and data management.
All the same ,you wrote nice piece.
Kudos.
This list maybe very useful commercially but for the diy, a few simple tools suffice. I for one would like to see an adjustable mitre block for picture frames etc. These don’t seem to be available? Thanks however for your list.
Finishing carpenter and wood leth work
Couldn’t agree more. Thanks for making such an informative post. Some of the stuff on this list is hard to find where I live but it’s fine. I’m glad i found this blog. Cheers
Nice post. Actually, need a wood cutting saw blade for my gardening work. Would you kindly suggest6 me which saw blade better for wood or tree cutting? Thanks
Lower tooth count for rough cutting. Higher tooth count for fine cutting. Every job has its own specifications.
Hi Thank you for this great and informative site,just found it and hope to learn a lot.I live on a small island in the Indian Ocean where things are not easy to find or are expensive.I am in my mid 50`s.and want to start collecting woodworking tools as I want to get into making lovely wood furniture that will keep me busy in my retirement,and hopefully help me to make some extra cash.Many thanks once again Marc
cool
Yes, most of these tools are very useful! Tools are so expensive now and if you can get one saw that will do a decent job for 2 other ones thats nice. I take apart pallets and then turn them into different things to sell and another useful saw is a reciprocating saw. That is very useful to take them apart because it is a quick change from a metal saw blade to a wood saw blade.
Some machines are inherently dangerous.. The table saw (specially without a riving knife will do big damage, not just to fingers. The router table has a nasty habit of flinging your workpiece across the room exposing your fingers to the blades. A radial arm saw needs very careful handling too.
Martin, I completely agree that some tools are more inherently dangerous than others. On a table saw, using a riving knife and anti-kickback pawls can save lives and appendages. Truly understanding your tools is just as important. When I first bought a table saw, I started using it without understanding that a misaligned blade or fence is the most likely cause of kickback. I was cutting a piece of plywood when it was pinched between the blade and the fence. A tooth caught, and the plywood climbed over the blade, shooting it back faster way than any human being could react. Fortunately, I stand in such a way that it missed me, and I escaped unharmed.
Needless to say, I spent some quality time tuning up that table saw before using it again, and I’ve never had problems since. If I had been using a properly aligned riving knife (a misaligned one can be worse than none at all) and anti-kickback pawls, this probably wouldn’t have happened, so I’m a big proponent.
Understand your tools, and reduce risk wherever you can.
From all of us at Wagner Meters, Happy (Safe) Woodworking!
They forgot the board stretcher….
Interesting. I have 38 out of 40. I’m missing a moisture meter (which I’ve always intended on getting), and a radial arm saw (which is outdated and dangerous, not to mention useless in my shop). There’s nothing I could do with a radial arm saw that I couldn’t already do with other tools.
I have four boys and I’m always looking for great gift ideas, thank you for this list! It helps me out a lot !!
Thanks a lot for compiling this list. It helped me identify couple of items I had seen in my neighborhood professional woodworker’s shop . The images and the description of the tools are very helpful.
Thanks for this 4 part series, We see a lot of people purchase these types of tools from our online tool store but it never ceases to amaze me what people miss, like safety. The comment above really says it all. Fingers don’t grow back, the other thing I would like to mention is that not all tools are made the same. Quality Brand name tools make a big difference too.
I have a major gripe with this list. Not for the list of tools, but the order. Safety equipment should always be number 1, and here it is number 40. Sure, this list is not specified to be in order of importance, but safety equipment should never be second to anything. It should be the first thing you see always.
I Agree Completely.
Fingers Do Not Grow Back.
Eyes Do Not Regenerate Themselves
Chris & Michael, You are absolutely correct. Safety is incredibly important and not to be overlooked. So as we wrap up the list Wagner wants to ensure that safety is not forgotten. If you remember nothing else remember to use each and every tool on the list with caution.